
You’re staring at a flat patch of lawn, and you want vegetables—real food, not ornamentals. But the soil is clay, the drainage is poor, and every time you try to dig, you hit a rock the size of a dinner plate. You need raised beds. Not the flimsy kits from the big-box store that rot in two seasons, but something that will last, drain perfectly, and let you grow Cherokee Purple tomatoes (which need 18 inches of root space) without fighting the ground. This guide walks you through building them from scratch—exact lumber dimensions, soil mixes that work, and the spacing that turns a 4×8 bed into a 40-pound harvest. You’ll learn why 12 inches is the minimum depth, what cedar actually costs (around $12 per 8-foot board), and why your first bed should be 4 feet wide, not 3. By the end, you’ll have a plan you can execute this weekend.
9 min read
In This Article
- Why Raised Beds Work for Permaculture Gardens
- Selecting the Right Materials
- Designing Your Bed: Dimensions That Work
- Step-by-Step Construction
- Filling the Bed: The Perfect Soil Mix
- Planting and Spacing for Maximum Yield
- Pest Management Without Chemicals
- Maintenance and Longevity
- Frequently Asked Questions
Key Takeaways
- Why Raised Beds Work for Permaculture Gardens
- Selecting the Right Materials
- Designing Your Bed: Dimensions That Work
- Step-by-Step Construction
Why Raised Beds Work for Permaculture Gardens
Raised beds aren’t just aesthetic. They solve three problems that plague beginner permaculture gardeners: poor soil, bad drainage, and weed pressure. In my zone 6b garden, the native soil is a heavy silt loam that turns to concrete in July. A 12-inch-tall bed filled with the right mix lets me grow carrots (Danvers Half Long, which need 8 inches of loose soil) without forking the ground. The bed warms faster in spring—by about 5°F compared to ground soil—which means I can sow peas (Sugar Ann) two weeks earlier than the neighbors.
From a permaculture perspective, raised beds create a defined growing zone. You concentrate your compost, your water, and your attention into a small area. A single 4×8 bed (32 square feet) can yield 40-60 pounds of vegetables per season if you use succession planting. That’s more than a 200-square-foot in-ground row garden produces in my experience, because the soil quality is consistent and you can manage pests by hand. The key is building them right the first time—skip the pressure-treated lumber that leaches copper, avoid beds narrower than 3 feet (they dry out too fast), and don’t skimp on depth.
That’s more than a 200-square-foot in-ground row garden produces in my experience, because the soil quality is consistent and you can manage pests by hand.
Selecting the Right Materials
Lumber: Cedar vs. Redwood vs. Composite
The most common question I get is, “What wood should I use?” Cedar is the gold standard for a reason. Western red cedar (Thuja plicata) contains natural oils that resist rot and insect damage. A 1x6x8 board costs about $12 at a lumberyard—expect to pay $60-$80 for a single 4×8 bed. Redwood is similar but roughly 20% more expensive and harder to find east of the Rockies. Avoid pressure-treated lumber manufactured before 2004 (it contained chromated copper arsenate), but modern ACQ-treated wood is safe for vegetable beds if you line the interior with 6-mil polyethylene sheeting. I don’t recommend it—the copper can still leach into acidic soil (pH below 6.0), and the sheeting creates a moisture barrier that rots the wood faster.
Composite decking (like Trex or TimberTech) lasts 25+ years but costs $20-$30 per 8-foot board. The downside: it’s heavy, requires pre-drilling, and doesn’t hold screws as well as wood. I’ve built two beds from composite—they’re stable but feel flimsy under 18 inches of soil. For a beginner, stick with untreated cedar. It will last 8-12 years in most climates. If you’re on a budget, use untreated pine and plan to replace the boards in 4-5 years. A pine 2x6x8 costs $6—you’ll save $50 upfront but spend more time and money later.
Hardware and Tools
You need corrosion-resistant screws—use #8 x 3-inch deck screws with a ceramic coating (a box of 100 runs $12 at Home Depot). Avoid galvanized screws for cedar; the zinc reacts with the wood’s tannins and causes black streaks. For corners, use 4×4-inch posts cut to the bed height (12 inches). Each post costs $8 for an 8-foot length, enough for four corner posts. Tools: a circular saw (or handsaw if you’re patient), a drill/driver, a tape measure, and a speed square. You don’t need a miter saw—straight cuts are fine for a rectangular bed.
Designing Your Bed: Dimensions That Work
Width: Why 4 Feet Is the Maximum
A bed wider than 4 feet forces you to step into it to reach the center. That compacts the soil, damages root systems, and defeats the purpose of raised beds. I learned this the hard way with a 5-foot-wide bed—I couldn’t reach the middle without kneeling on the soil, and my Cherokee Purple tomatoes (spaced 24 inches apart) yielded 30% less than the ones in the 4-foot bed. Stick to 3.5 to 4 feet wide. Length is flexible: 6, 8, or 12 feet. An 8-foot bed gives you enough space for two rows of tomatoes (4 plants per row) or a mix of peppers and basil.

Depth: 12 Inches Minimum
Shallow beds (6-8 inches) restrict root growth. Carrots need 8-10 inches of loose soil. Tomatoes need 12-18 inches. Potatoes need 12 inches minimum for hilling. If you build a 6-inch bed, you’re limited to lettuce, radishes, and shallow-rooted herbs. For a food forest or permaculture garden, 12 inches is the sweet spot—it holds enough moisture to reduce watering frequency, provides space for root vegetables, and costs about $40 more in lumber than an 8-inch bed. If you’re planting fruit trees or large shrubs, skip raised beds entirely and use berms or swales.
If you’re planting fruit trees or large shrubs, skip raised beds entirely and use berms or swales.
Step-by-Step Construction
Step 1: Prepare the Site
Choose a location with at least 6-8 hours of direct sunlight. Mark the bed outline with stakes and string. Remove grass or weeds by hand—don’t use herbicide. If the area is weedy, lay down a layer of cardboard (remove tape and labels) to smother growth. The cardboard decomposes in 6-12 months and adds organic matter. Level the site with a rake—a sloped bed will settle unevenly and cause water to pool at one end. In my yard, I spent 30 minutes leveling a 4×8 area, checking with a 4-foot level. The difference was 2 inches from one corner to the other, which I corrected by digging down the high side.
Step 2: Cut the Lumber
For a 4×8 bed that’s 12 inches tall, you need: two 8-foot boards for the long sides, two 4-foot boards for the short sides, and four 12-inch 4×4 posts for corners. If you’re using 1×6 lumber (actual thickness 3/4 inch), stack two boards per side to reach 12 inches. Cut the 4×4 posts to 15 inches—the extra 3 inches will be driven into the ground. Use a circular saw with a 40-tooth carbide blade for clean cuts. Measure twice, cut once. I’ve wasted $30 in lumber from one bad cut—double-check your measurements.
Step 3: Assemble the Frame
Lay the boards on a flat surface. Attach the short side boards to the posts using three screws per joint—one near the top, one in the middle, one near the bottom. Pre-drill holes to prevent splitting, especially near the ends of cedar boards. Attach the long side boards to the same posts. The posts should be on the inside of the bed for a cleaner look. Drive the screws flush with the wood surface—countersink them 1/8 inch if you’re worried about rust streaks. Assemble all four sides on the ground, then lift the frame into place.
Step 4: Secure the Bed
Once the frame is positioned, drive the 4×4 posts into the ground using a sledgehammer. If the soil is hard, dig a 3-inch hole first. Check for level again—adjust by hammering the high side deeper or adding soil under the low side. For extra stability on slopes, use rebar stakes (1/2 inch diameter, 18 inches long) driven through the posts at a 45-degree angle. I skipped this step on my first bed, and a heavy rain shifted it 2 inches—the posts kept it from tipping, but the soil spilled out the gap.
Filling the Bed: The Perfect Soil Mix
The 3-Component Recipe
Don’t use garden soil—it compacts in a raised bed. Use a mix of: 40% coarse vermiculite (for aeration), 40% compost (for nutrients), and 20% peat moss or coconut coir (for moisture retention). A 4x8x1-foot bed holds about 24 cubic feet of soil. That’s 9.6 cubic feet of vermiculite ($20 per 2-cubic-foot bag at a garden center), 9.6 cubic feet of compost ($5 per bag if you buy in bulk, or free if you make it), and 4.8 cubic feet of peat moss ($15 per 3-cubic-foot bale). Total cost: roughly $130 for the soil mix. If that sounds steep, substitute 50% topsoil (screened, $3 per bag) and 50% compost—it’s heavier but cheaper.
Layering for Permaculture
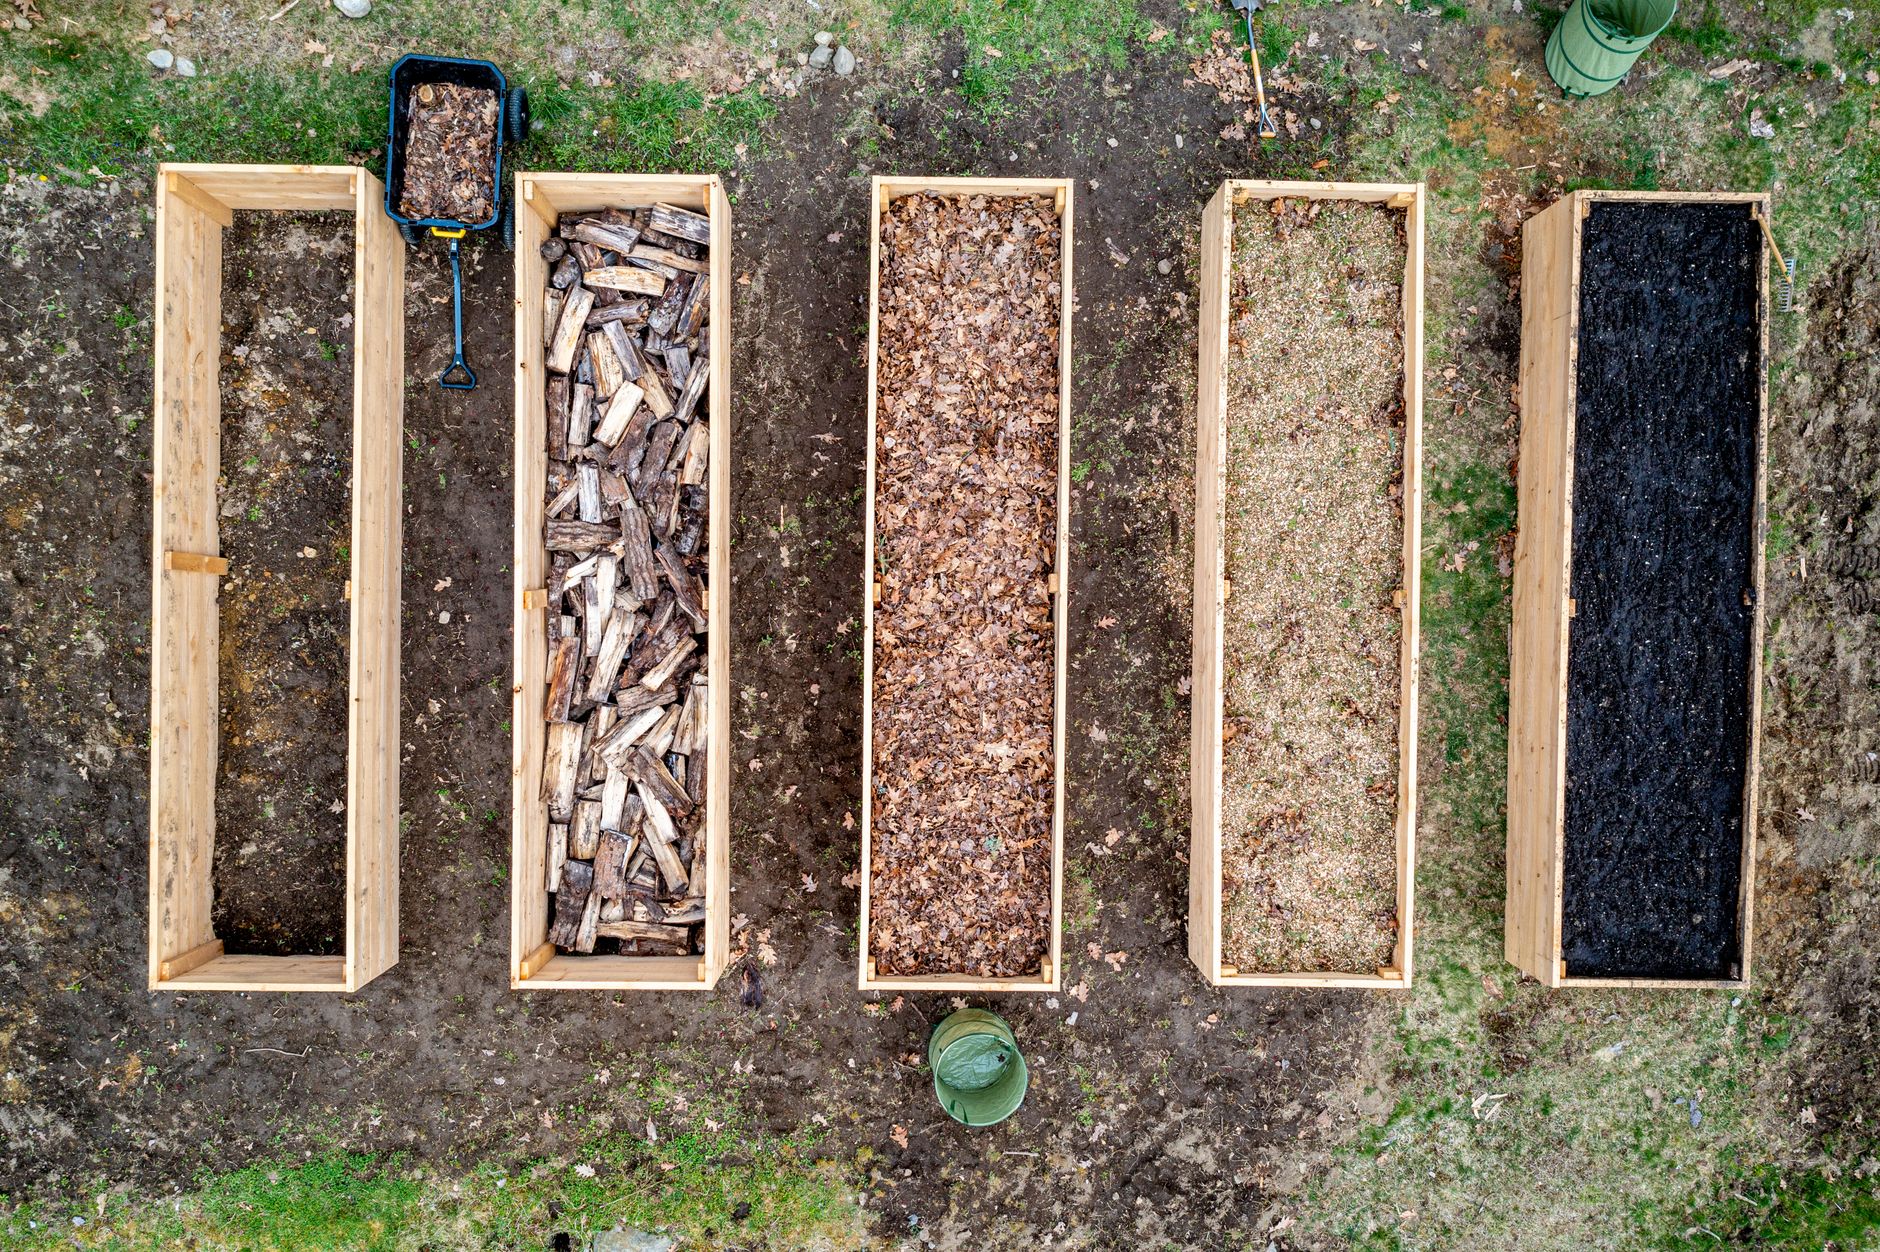
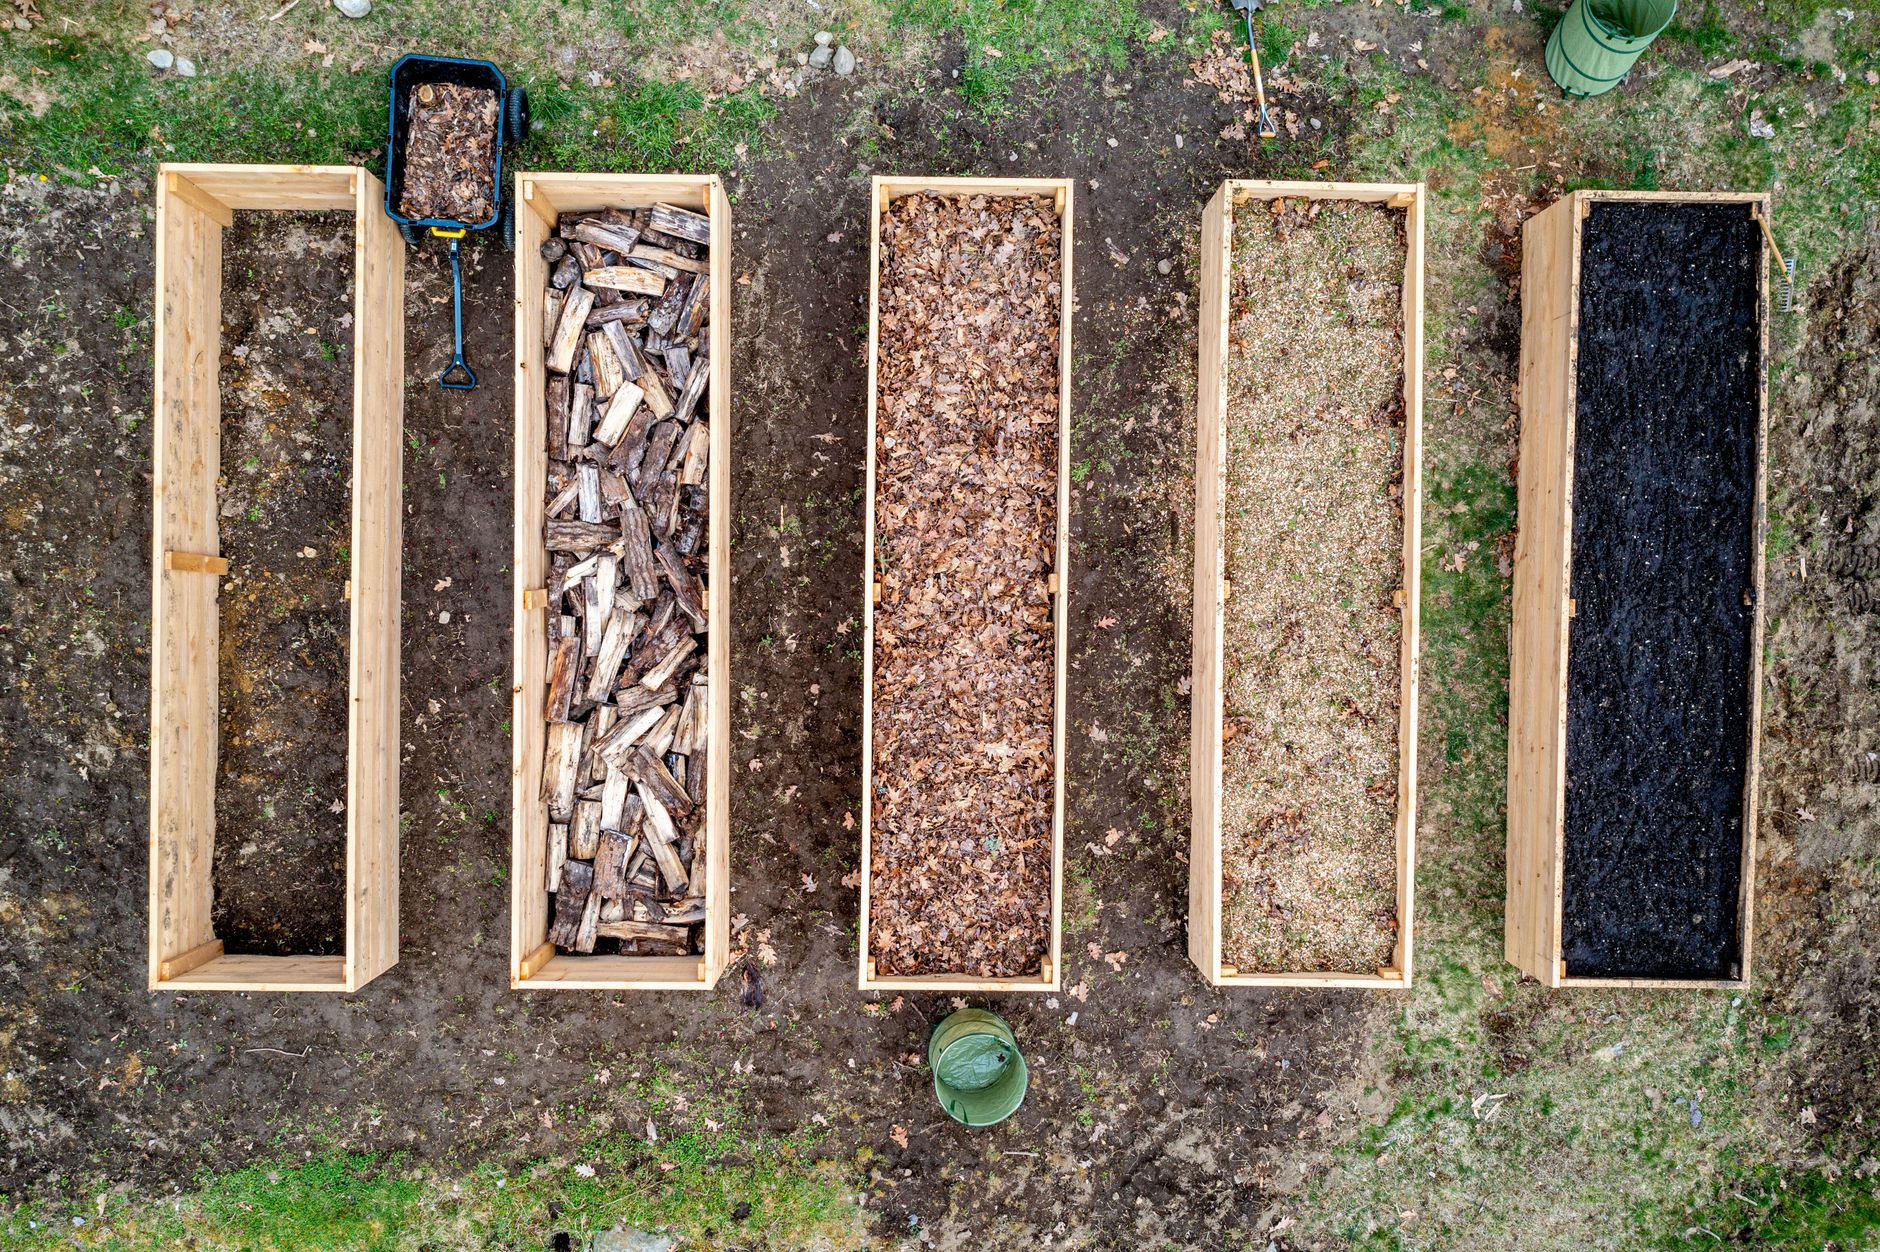
Instead of dumping the mix in all at once, use the lasagna method: lay down 4 inches of cardboard or newspaper (weed barrier), then 6 inches of coarse wood chips (drainage layer), then the soil mix. The wood chips decompose slowly and feed the soil food web. I’ve used this in three beds and seen earthworm populations double within a year. Avoid using fresh manure—it burns roots. If you must, use aged manure (at least 6 months old) and mix it into the bottom 6 inches of the bed.
If you must, use aged manure (at least 6 months old) and mix it into the bottom 6 inches of the bed.
Planting and Spacing for Maximum Yield
Companion Planting Matrix
Raised beds allow tight spacing. In a 4×8 bed, I plant: two rows of tomatoes (Cherokee Purple and San Marzano, 24 inches apart, 4 plants total), with basil (Genovese) planted between them (12 inches apart, 6 plants). The basil repels aphids and improves tomato flavor. At the bed edges, I sow carrots (Nelson, 2 inches apart in rows 6 inches apart) and radishes (Cherry Belle, 1 inch apart) as a living mulch. This combination yields 15-20 pounds of tomatoes, 3 pounds of basil, 8 pounds of carrots, and 2 pounds of radishes per season.
Seasonal Calendar for Zone 6
- March 15-April 1 (4-6 weeks before last frost): Sow peas (Sugar Ann), spinach (Bloomsdale), and lettuce (Buttercrunch) directly in the bed. Cover with row fabric if temps drop below 25°F.
- May 1-15 (after last frost): Transplant tomatoes, peppers (California Wonder), and basil. Space peppers 18 inches apart.
- June 1: Sow beans (Provider) in the space left by harvested peas. Plant cucumbers (Marketmore) on the north side of the bed (they climb a trellis).
- August 1: Pull spent pea plants, add 2 inches of compost, and sow fall carrots (Bolero) and kale (Winterbor).
- October 1: Cover bed with 4 inches of straw mulch. The compost will break down over winter, feeding the soil for spring.
Pest Management Without Chemicals
Raised beds concentrate pests, but they also concentrate predators. I manage aphids by planting dill and fennel (which attract ladybugs and lacewings) at the bed corners. For tomato hornworms, I hand-pick them every morning in July—one pass takes 5 minutes. If you see whiteflies, spray the undersides of leaves with neem oil (100% cold-pressed, mix 1 teaspoon per quart of water with a drop of dish soap). The biggest mistake beginners make is overwatering—soggy soil attracts fungus gnats and root rot. Water only when the top 2 inches of soil are dry, typically every 2-3 days in summer.
Maintenance and Longevity
After the first season, the soil level will drop by 2-3 inches as organic matter decomposes. Top it off with 2 inches of fresh compost each spring. Every 3 years, replace the top 6 inches of soil to prevent nutrient depletion and disease buildup. The cedar boards will weather to a silver-gray—that’s normal and doesn’t affect durability. Check the screws annually; if any are rusted, replace them with stainless steel (#8 x 3 inches, $15 for a box of 50). In zone 6 and colder, the freeze-thaw cycle can loosen the frame. Tighten the corner post screws each spring.
Small changes, real momentum
Get practical guides and templates you’ll actually use — a few thoughtful emails a month.
Frequently Asked Questions
Can I build a raised bed on a slope?
Yes, but you need to terrace the bed or use a stepped design. For a gentle slope (less than 2 inches of drop over 8 feet), dig the high side deeper so the frame sits level. For steeper slopes, build multiple smaller beds (3×4 feet) that follow the contour. I’ve built a terraced system on a 15% slope using 6-inch pressure-treated landscape timbers—each bed is 3 feet wide and stepped 6 inches higher than the one below. It cost about $200 for four beds and has been stable for 5 years.
How do I prevent weeds from growing underneath?
Lay down a double layer of cardboard (remove tape and labels) before filling the bed. The cardboard blocks light and smothers grass and weed seeds. It decomposes in 6-12 months, but by then the bed’s soil is deep enough that weeds can’t push through from below. Avoid landscape fabric—it blocks water and creates a barrier that roots can’t penetrate. I’ve used both, and cardboard consistently outperforms fabric in my beds.
What’s the best way to water a raised bed?
Drip irrigation is ideal. Use 1/4-inch soaker tubing with emitters spaced 12 inches apart. Connect it to a timer (like the Orbit 62061Z, $25) that waters for 30 minutes every other day in summer. For a single 4×8 bed, you’ll need 20 feet of tubing ($10) and a pressure regulator ($8). Hand-watering works but wastes time—I spent 10 minutes per bed per day before installing drip. Mulch the soil surface with 2 inches of straw to reduce evaporation by 50%.
Grow Something Good
Seasonal how-tos and sustainable gardening you can actually use.